Proper sediment control is one of the most essential SWPPP requirements for any construction zone.
Not only does sediment erosion pose a risk to surrounding wildlife and ecosystems, but it could leave your construction zone liable to fines and significant financial damages.
According to the EPA and Clean Water Act, construction zones that disturb more than one acre of land are responsible for proper permitting and erecting sediment erosion controls.
Generally, construction managers have a few options for sediment control, including:
- Silt Fences
- Straw Bales
- Sand Bags
- Gravel Bag Berms
- Fiber Rolls
Silt fences are considered the most effective barrier for trapping coarse sediment erosion from disturbed areas.
Laboratory work from the Virginia Highway and Transportation Research Council found that silt fences work more effectively at trapping sediment materials than straw bales and even slow the flow of stormwater runoff.
Unfortunately, one of the biggest obstacles to proper sediment control is the appropriate installation of silt fences, which determines their efficacy. For this reason, we’ve prepared this guide to discuss using silt fences and proper Best Management Practices (BMPs) to set up and use silt fences in your SWPPP.
Why Is Sediment Control Important?
Sediment control is critical to any construction site’s Stormwater Pollution Prevention Plan (SWPPP).
Without proper sediment control measures, soil erosion can cause significant environmental damage, contaminating nearby water bodies via turbidity, harming local wildlife, and disrupting ecosystems.
Regulatory agencies like the EPA and state environmental departments enforce strict sediment control requirements to protect water quality.
Construction projects that disturb more than one acre of land must implement sediment control measures to obtain a Construction General Permit.
What is a Silt Fence?
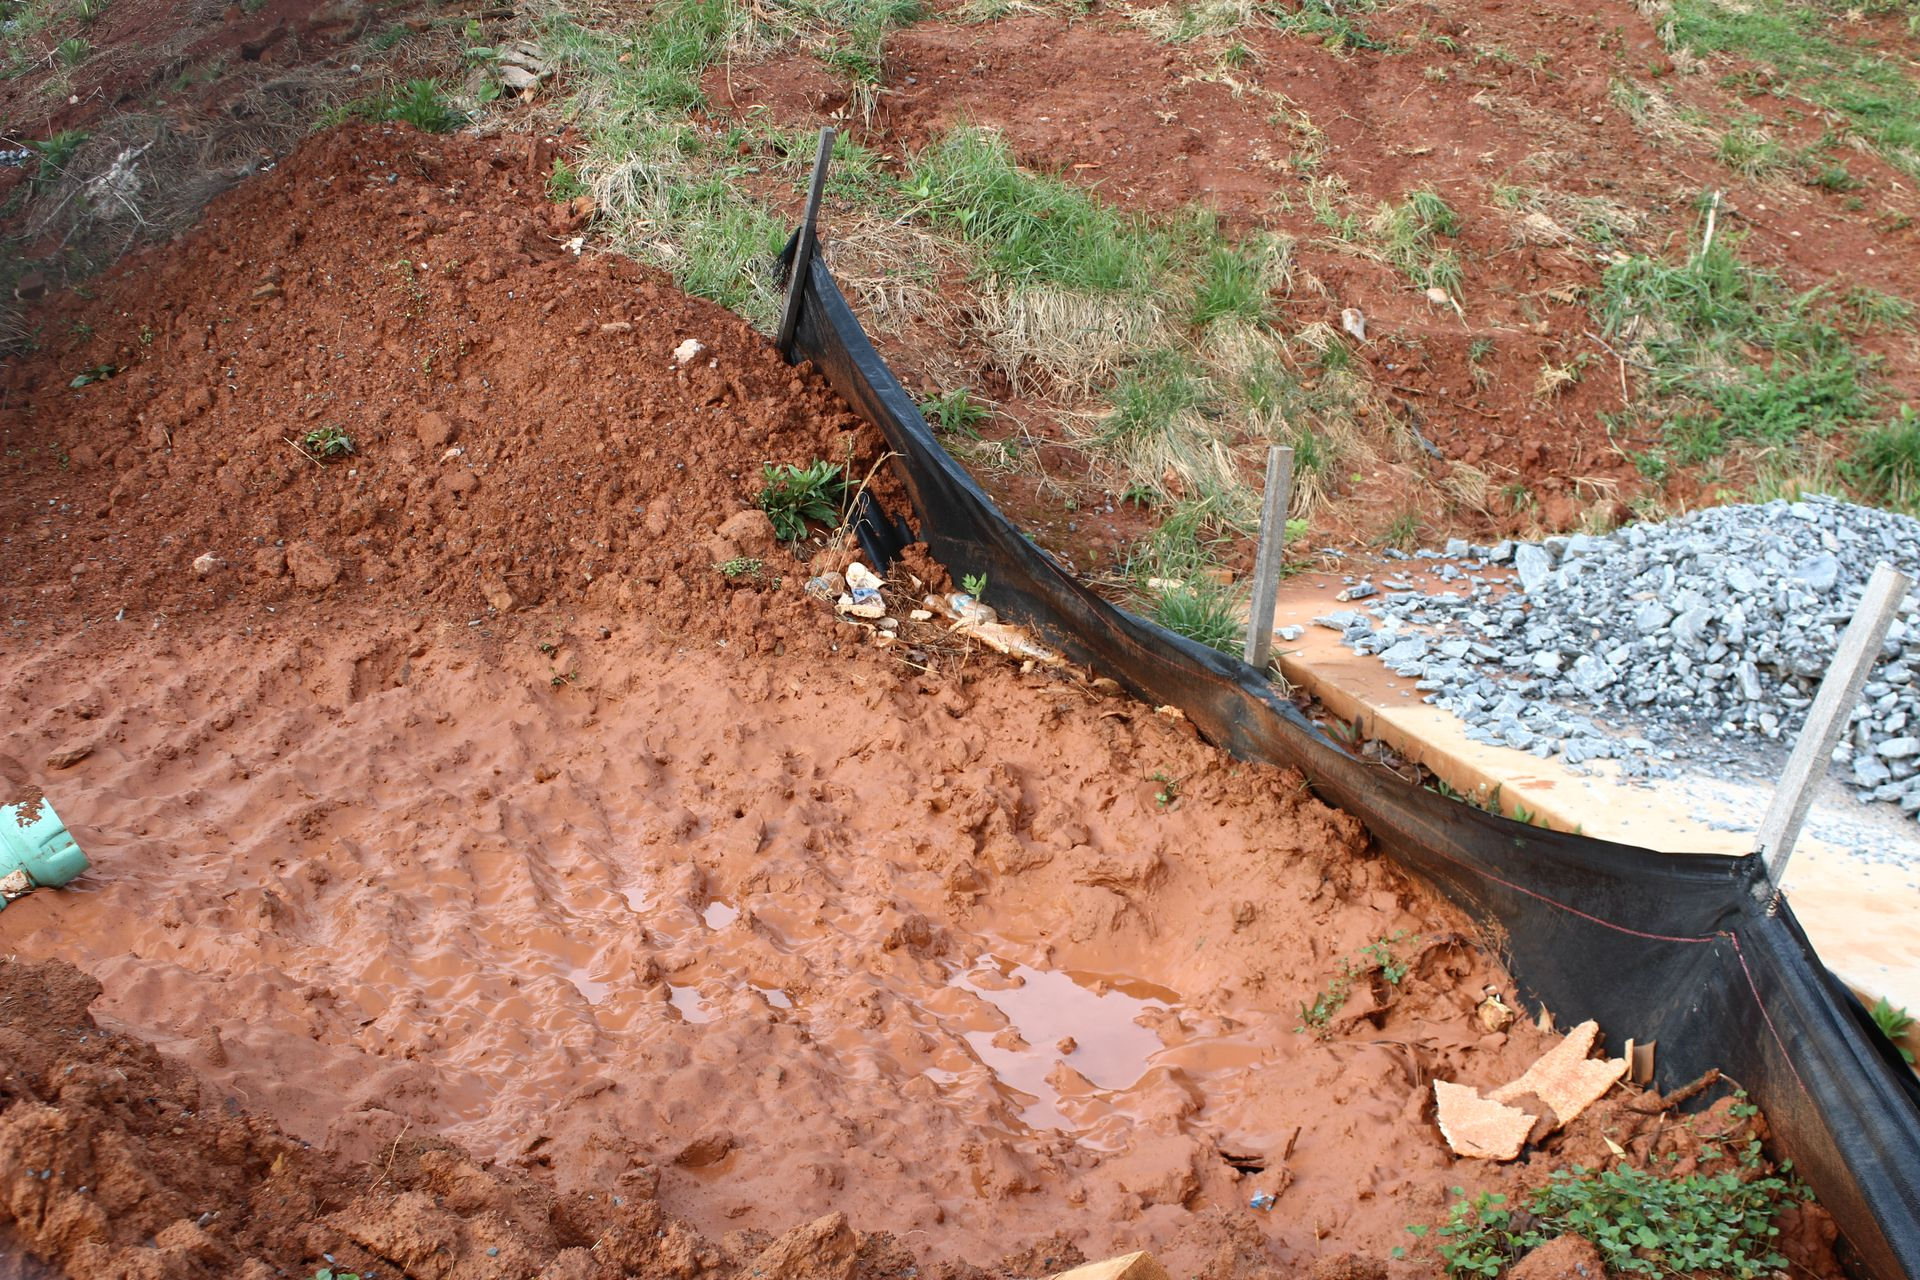
A silt fence is a temporary sediment control barrier constructed of geotextile fabric entrenched in the ground and attached to wooden or metal poles.
The goal of silt fences is to control the flow of sheet and overland flows and trap coarse sediment material so that they don’t exit the construction site and end up in rivers, streams, or sewage systems.
Once construction has finished, construction managers can implement plans to stabilize the previously disturbed area and take down their silt fencing.
According to some estimates, a 100ft. stretch of silt fencing is estimated to hold up to 50 tons of sediment in place.
Silt fencing is typically located downstream or downhill from active workzones with about 2’ high of exposed silt fencing to gather materials.
Silt fences are also entrenched anywhere from 8-12” in the ground and compacted using soil to ensure they remain sturdy and prevent washouts.
Below, we’ve listed a few appropriate and inappropriate uses of silt fences to control sediment erosion and runoff.
Silt Fence Uses
- Along the perimeter of an active construction zone
- Around material stockpiles and soil area
- Below exposed slopes to prevent overflow
- Around streams and other vulnerable ecological systems
Silt Fence Restrictions
- Overland or sheet flows of over 0.5cfs
- Areas subject to flooding
- Uneven or contoured terrain
- Slopes greater than 4H:1V
With this in mind, let’s outline a few silt fence BMPs to help you develop your SWPPP and ensure proper compliance with the law.
Types of Silt Fences
While most worksites use standard silt fences, several different silt fences are designed for various applications.
- Standard Silt Fence: A basic geotextile barrier attached to wooden or metal posts, ideal for areas with low to moderate water flow.
- Reinforced Silt Fence: Includes stronger fabric or wire backing for added durability on sites with steep slopes or high water flow.
- Wire-Backed Silt Fence: Combines geotextile fabric with metal mesh for enhanced strength in areas with heavy sediment or high winds.
- Floating Silt Fence (Turbidity Barrier): Designed for aquatic environments, it floats with a weighted bottom to contain sediment near water bodies.
SWPPP BMPs for Silt Fences
Location
Installing silt fences at the right location is essential because it will help avoid flooding and sediment erosion loss.
In addition, a silt fence should pool water and sediment erosion inside the barricades, preventing water from flowing around the sides or over the top of the barricaded area.
Some BMPs to properly locate and install your silt fence include:
- Running the right length of fence: Running too long of a fence could end up concentrating distrubed materials at the lowest point of your fence and cause flooding.
- Give your fence enough room. The drainage area above a silt fence shouldn’t exceed more than a quarter of an area. Consider using multiple silt fences throughout to concentrate sediment runoff and silt into manageable areas.
- Use J-hook fences to concentrate sediment runoff in small areas. Instead of running a long stretch of fence around your entire perimeter, use J-fences to trap runoff and erosion in small areas to prevent spread throughout and beyond the site. This strategy also helps prevent sediment flow from going around the fence.
- You can trap sediment runoff and water flow in heavy rain storms by running a short fence along the top ends of a hill and placing the middle beneath the ends at the toe. This will be easier to clean up and restore since only heavy materials should flow over the top.
- Install fences before paved areas, conduits, and inlet basins. Paved areas can be difficult to treat and control if flooded by sediment runoff.
- Direct heavy sediment flows to a sediment pond. Use silt fences to divert excessive stormwater runoff to a pond that can be easily stored during construction and stabilized afterward.
Materials
Using the right silt fence materials is important for adequately controlling sediment erosion and keeping your silt fence within budget.
Generally, we recommend a heavy porous fabric that won’t rip and tear. Avoid any lightweight fabric that doesn’t stand up to heavy materials, including woven or mono-filament.
Next, use metal posts instead of wooden posts for proper stability and to save money on chainlinks and structural wiring. Metal posts are also easier to drive into the ground (up to 2’ feet) than wooden posts and tend to stand up to excessive water flows better without sagging or tipping.
Space metal posts about 6-7 feet in areas with light horizontal loads and 3-4 feet in areas where there is excessive risk of flooding over the top of the fence.
Installation
There are generally two methods to properly install a silt fence, including the trenching and static slicing method.
Trenching is a traditional method that involves digging a 6” deep and 6” wide trench with curved edges to install silt fabric and drive posts into the ground.
The fabric is then held in place by a heavy material like concrete or stones that help prevent washout and direct runoff to a proper discharge area.
The static slicing method is often more straightforward, featuring a machine that cuts 12” slits in the ground while pushing soil vertically next to the slit.
Once the mesh material is installed, a tractor wheel is rolled over the disturbed soil about two times to compact the soil and achieve nearly perfect compaction. This method is beneficial because it reduces infiltration and spaces in the soil to prevent water from flowing underneath the fence.
Maintenance
Finally, routine inspection and maintenance of silt fencing should be implemented to ensure proper function. One problem you’ll run into is that silt fencing typically clogs after use and can be nearly impossible to clean back to new again.
Generally, when sediment has risen to about half the level of your fence, it’s wise to install a second fence above or below the original fence.
Since your original fence will not be able to trap materials and flow like it once did, you’ll need to routinely improve or erect new fencing, following these BMPs, to ensure proper compliance.
Removing sediment can be difficult, so leaving the sediment in place and erecting new fences is always your most efficient option.
Whether you’re developing a stormwater management plan or an SWPPP, proper silt fence BMPs are crucial to ensuring your construction zone complies with federal and state law and doesn’t disturb surrounding environments.
In addition, following proper BMPs for silt fencing is important to ensure your silt fences work properly.
Why Hire a Silt Fence Company for Installation?
Hiring a professional silt fence installation company ensures effective sediment control, regulatory compliance, and long-term cost savings.
Experts understand federal, state, and local regulations, strategically placing fences in line with SWPPP guidelines and BMPs.
If you need help drafting a SWPPP and managing your silt fence installation, contact the experts at Path Light Pro. We can handle all aspects of stormwater management, from erosion to sediment control.
FAQs
How long do silt fences last?
Silt fences typically last between six months to a year, depending on weather conditions, sediment load, and maintenance. Heavy storms, excessive sediment buildup, or poor installation can shorten their lifespan. Regular inspections and timely repairs help extend their effectiveness.
Can I install a silt fence myself?
While it is possible to install a silt fence yourself, professional installation ensures compliance with regulations, proper placement, and increased durability. Incorrect installation can result in sediment washouts, regulatory fines, and additional costs for repairs or reinstallation.
What happens if a silt fence fails?
If a silt fence fails, sediment runoff may escape the site, leading to environmental damage and potential fines. To prevent failures, it’s crucial to follow best management practices (BMPs), conduct regular maintenance, and reinforce areas that are prone to high water flow or sediment loads.